I recently decided to do some rearranging in my craft room. I'm fortunate to have ample space for crafting/storing supplies, but over time, the focus of my interests has changed, and the layout of my room didn't reflect those changes.
For instance, one large table went almost unused, because it was still a dedicated "clay table" (for using polymer clay). For the time being, I'm no longer "claying" often enough to merit a whole large table that is only for clay. Instead, I've sometimes found myself wishing for more room when cutting fabric and sewing. Why not combine the two large tables into one (almost) continuous surface?
As for the rest... Well, why don't I just show youin a series of very repetitive photos?
(Quick, take a good swig of your favorite form of caffeine; I'm setting up a room.)
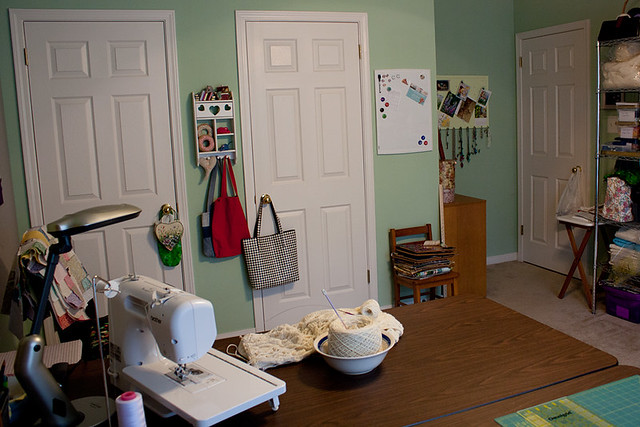
Here's the room from the doorway. My favorite thing about this space is the large bank of windows, which give it a bright, airy feeling. The fact that the windows face east is a bonus, because the room stays cooler in summer than it would on the west side of the house.
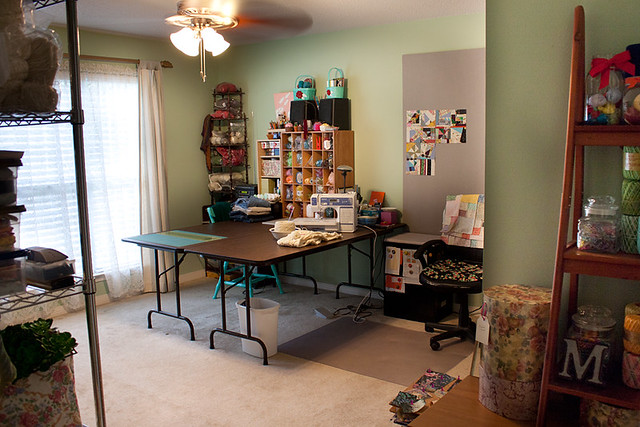
(Side note: While I think I'm happy with the reconfiguration of the furniture, I still want/need to hang things on the walls and rearrange some of the things already hanging. I'm notoriously slow at deciding where things should go on walls, though, so that may take a while...)
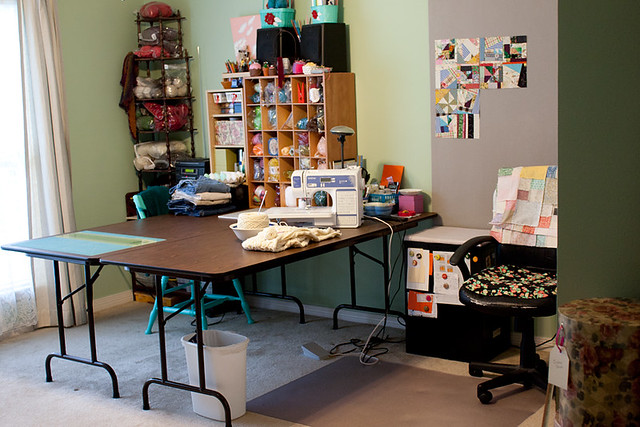
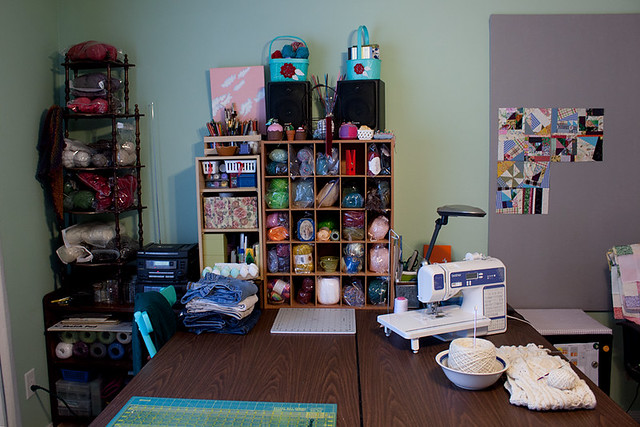
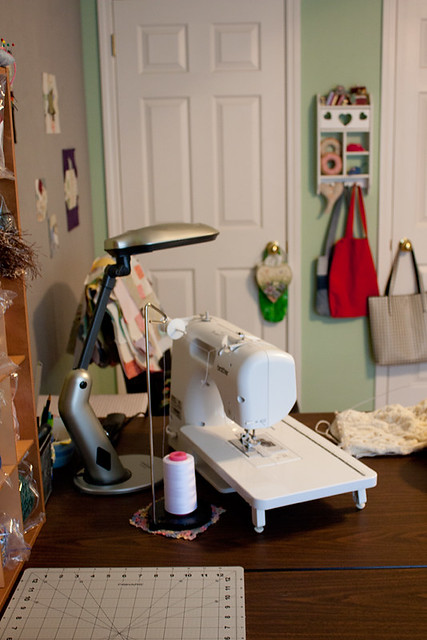
This is the heart of the room-- the two large tables pushed together to make one large surface for cutting, sewing, yarn crafts, paper crafts-- basically anything that's not too messy (though I may do wet/sticky projects like painting and clay on the other side of the table, sometimes.)
The small black filing cabinet (which houses scrapbooking/paper-crafting supplies) used to be hidden away in the closet. Now, it's stationed to the right of my sewing machine, where it serves two purposes. The side acts as a magnet board for temporarily storing paper notes about on-going sewing projects. More importantly, however, the top gives me a place to quickly press fabric as I piece at the sewing machine. I used to have to get up and walk to the small ironing board every time, which quickly adds up during something like string piecing. I think this will save lots of time and energy!
To make the filing cabinet top nicer for pressing, I made a simple pressing board from a scrap piece of plywood Donald cut to size. A couple layers of an old cotton towel and a piece of heavy cotton fabric (freebie fabric) stapled into place completed the project.
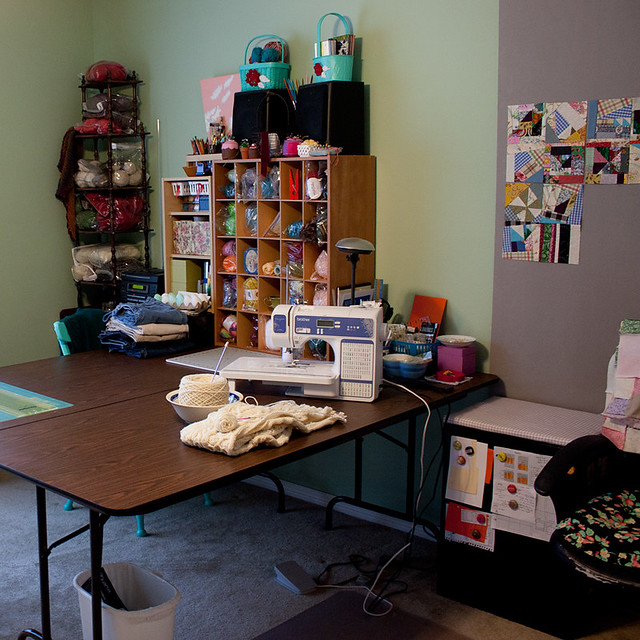
The cubby storage against the wall is something I've had for a while. Donald found them and got one for each of our hobby rooms. (He paints miniatures.) I think they were originally intended for storing shoes, but I'm using mine to store smaller amounts of non-acrylic yarn. (Acrylic yarn-- which I use for large projects, like afghans and cushion covers-- takes up a lot more space, so I keep it in plastic crates stacked on their sides in the closet. Arranged by color, of course. ;o))
Those are speakers on top. They're attached to the old boom box stereo my parents gave me when I was in high school. It's still going strong, all these years later! (I sometimes like listening to talk radio when I craft, if there's anything good on.)
The "tower shelf" beside the cubbies is something that was formerly on the clay table, but now it's a hold-all for various and assorted craft supplies. Pencils, paintbrushes, crayons, paint, glitter, magnets, etc.
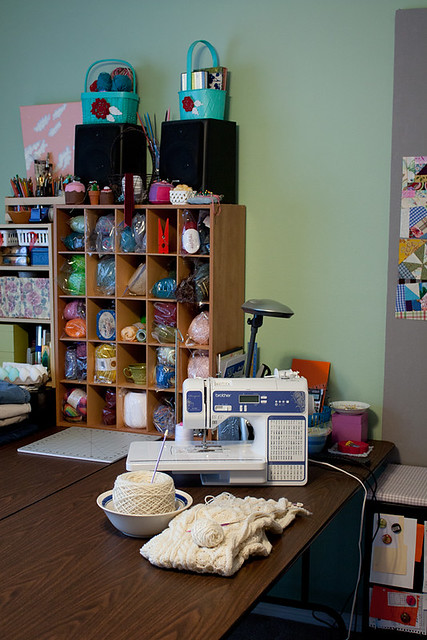
I'm not completely sure I'll keep the area to the right of the cubby storage arranged as it is now. I like having room to the right of my sewing machine for things like pins, paper/notes, scissors/snips, etc.-- but I'm not sure this is the most efficient/effective use of the space. It can be tweaked. (Maybe some storage/shelves hanging on the wall right there? That would leave the table top free...)
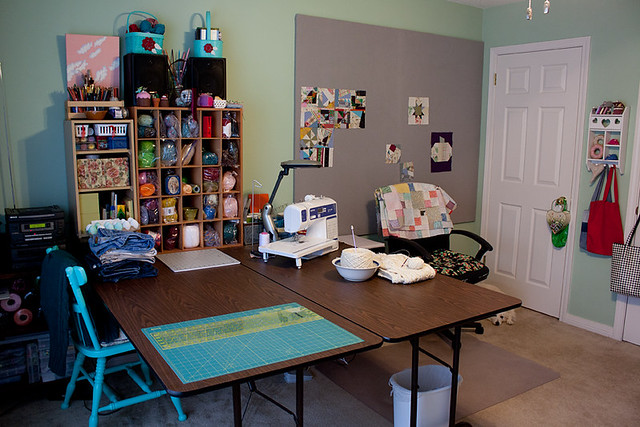
After deciding to rearrange the furniture, I looked for an arrangement that would allow room for a quilt design wall. A design wall is basically any vertical surface covered with (usually) either batting or flannel. Cotton fabric tends to stick to these materials, so you can easily rearrange and view quilt blocks, fabric swatches, etc. from a distance. A design wall can be as simple as a piece of fabric/batting hung on a wall, but many people cover foam boards/insulation board, which means you can also push pins into the board (if a piece won't stick on its own).
Donald helped me make mine from foam insulation board that we covered with grey flannel (which I had to seam to get to the right size). We used a spray adhesive to attach the flannel to the front. All I'll say about that is that (with the spray we used, at least) you should avoid spraying directly on the fabric. A bit of spray went rogue and left a small but permanent "dark spot" on our fabric. (Which annoyed me greatly, to be honest. But I'll just keep a strategically placed piece of cotton up there to hide it.) To further secure the fabric, we duct taped it to the back.
To hang the design wall, Donald found the studs in the wall where we wanted it, measured to locate where the bottom edge would be, and hammered a nail in each stud along that edge. This gives the foam board something to rest on, supporting its weight. We then put pieces of strong, double-sided mounting tape (the type with a foam center) here and there around the back of the design wall, got it into position (resting on the row of nails), and pressed it against the wall. ...I really don't think it's going anywhere.

On the left side of this photo, you can see the stereo and a hand-me-down shelving unit I use to store more yarn. Both are standing on a shelving unit where I keep beading supplies and crochet thread.
Here's another view of the new design wall (which seems to work very well so far!), as well as the doors to the long closet that runs along one wall of the room. Plenty of storage in there, too, of course. I chose to site the design wall perpendicular to the "closet wall" to make use of space that would otherwise be wasted. Furniture can't be placed too close to that corner, because it interferes with the closet door, but the design wall fits just fine, and since the closet is usually closed, it doesn't block the design wall.
(The canine companion in some of these photos is Luna the American Eskimo Dog.)

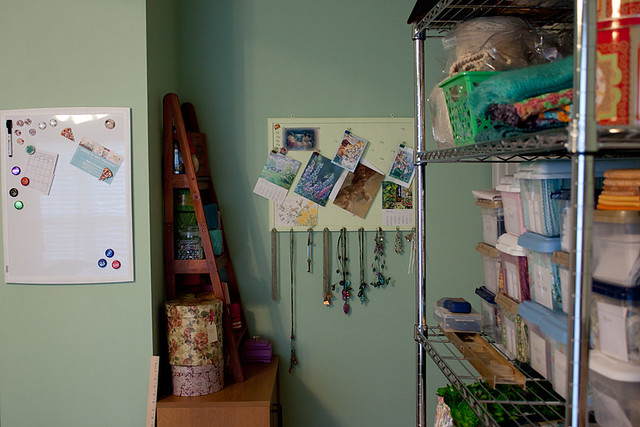
Looking further along the "closet wall", you can see the door into the room. This little nook could easily be wasted space, but I've done my best to make it useful. There's a bulletin board on one side of the nook (behind the door, when it's opened).
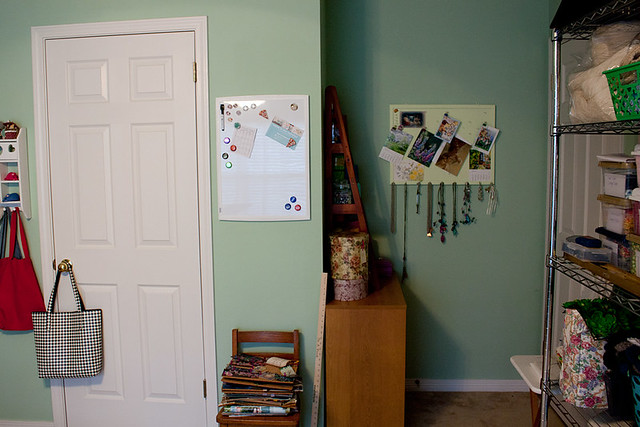
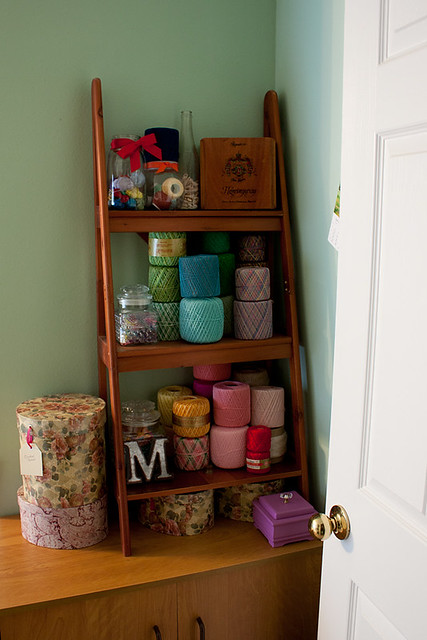
On the adjacent wall is a storage cabinet, the surface of which fits a small shelf and some boxes-- the home of the rest of my thread crochet stash.
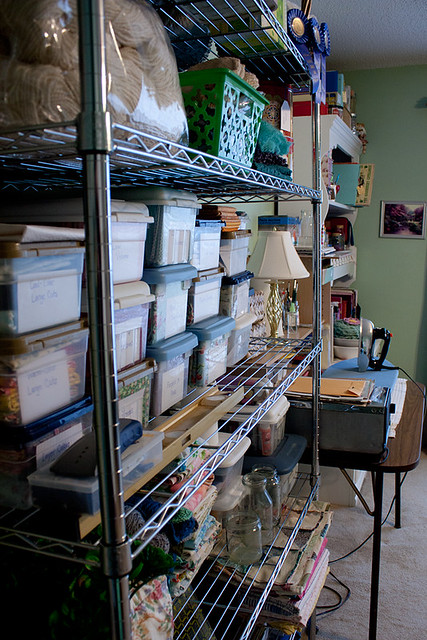
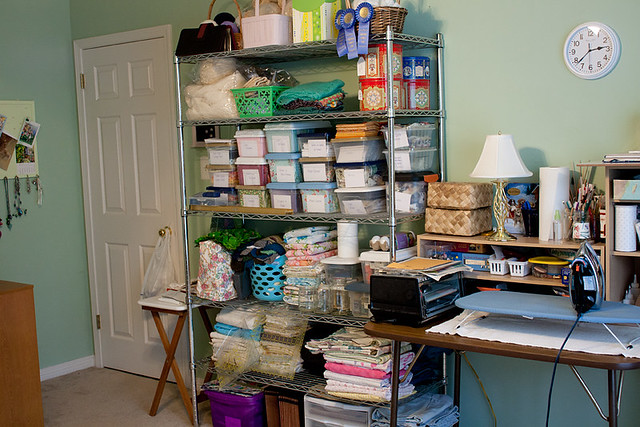
On the remaining wall (the wall with the door into the room), I placed the large metal shelving unit, which houses mainly fabric, but also yarn, sewing thread, knitting needles, my old sewing machine, craft paints, and various odds and ends.
Next along that wall, there's a smaller table. This is where I'll keep the small ironing board and my polymer clay supplies/tools. When I want to do clay, I'll probably move the ironing board to the other tables and work here. It's not a huge space, but I'm sure it will suffice.
The little clay-dedicated toaster oven can also be moved, of course. Actually, I may find another spot for that, anyway. The ironing board is a bit cramped, as things stand, and I'm sure I can find another place to tuck the oven away until it's needed.
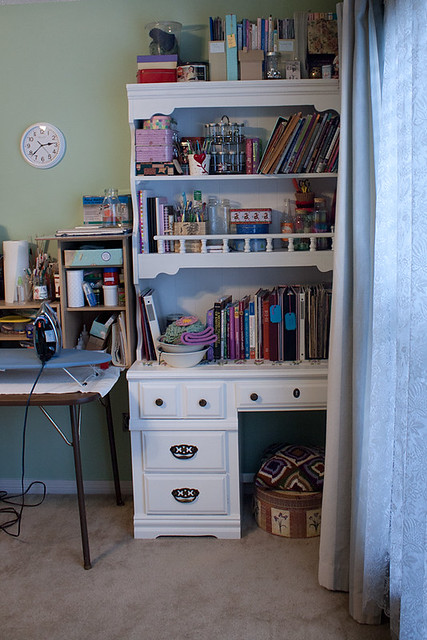
In the last corner of the room stands the desk and hutch-- one of only a couple of pieces of furniture in the room that didn't move an inch. This is where I keep books and all sorts of bits and pieces-- everything from crochet hooks and knitting needles to hot glue sticks and ribbon. I don't use it as a desk, so the spot where a chair would normally go can also be used as storage-- at the moment, for a hat box and a throw pillow.
I think that just about covers it (short of giving sneak peeks into the messy closet and crowded drawers)! I'm enjoying putting on the finishing touches, and I'm looking forward to sitting down at the sewing machine to see how the new layout feels.
It's a cozy, comfortable room and feels all the more homey after the clean-up that came with the rearranging.
I'm so excited to have a design wall, too! Now that I have my very own Quilt Design Wall, I really need to start sewing more and living up to it. ;o)

To close, here are a few more photos of Luna, who wondered why I was taking dull photos inside the house. (She knows that when I get the camera, it usually means I'm going outside, which is a super fun time for the dogs, who LOVE being outside with The People.)

~~SIGH~~

Sooooo boooooooooooring....

. . . going into an ennui-induced trance . . .
For instance, one large table went almost unused, because it was still a dedicated "clay table" (for using polymer clay). For the time being, I'm no longer "claying" often enough to merit a whole large table that is only for clay. Instead, I've sometimes found myself wishing for more room when cutting fabric and sewing. Why not combine the two large tables into one (almost) continuous surface?
As for the rest... Well, why don't I just show you
(Quick, take a good swig of your favorite form of caffeine; I'm setting up a room.)
Here's the room from the doorway. My favorite thing about this space is the large bank of windows, which give it a bright, airy feeling. The fact that the windows face east is a bonus, because the room stays cooler in summer than it would on the west side of the house.
(Side note: While I think I'm happy with the reconfiguration of the furniture, I still want/need to hang things on the walls and rearrange some of the things already hanging. I'm notoriously slow at deciding where things should go on walls, though, so that may take a while...)
This is the heart of the room-- the two large tables pushed together to make one large surface for cutting, sewing, yarn crafts, paper crafts-- basically anything that's not too messy (though I may do wet/sticky projects like painting and clay on the other side of the table, sometimes.)
The small black filing cabinet (which houses scrapbooking/paper-crafting supplies) used to be hidden away in the closet. Now, it's stationed to the right of my sewing machine, where it serves two purposes. The side acts as a magnet board for temporarily storing paper notes about on-going sewing projects. More importantly, however, the top gives me a place to quickly press fabric as I piece at the sewing machine. I used to have to get up and walk to the small ironing board every time, which quickly adds up during something like string piecing. I think this will save lots of time and energy!
To make the filing cabinet top nicer for pressing, I made a simple pressing board from a scrap piece of plywood Donald cut to size. A couple layers of an old cotton towel and a piece of heavy cotton fabric (freebie fabric) stapled into place completed the project.
The cubby storage against the wall is something I've had for a while. Donald found them and got one for each of our hobby rooms. (He paints miniatures.) I think they were originally intended for storing shoes, but I'm using mine to store smaller amounts of non-acrylic yarn. (Acrylic yarn-- which I use for large projects, like afghans and cushion covers-- takes up a lot more space, so I keep it in plastic crates stacked on their sides in the closet. Arranged by color, of course. ;o))
Those are speakers on top. They're attached to the old boom box stereo my parents gave me when I was in high school. It's still going strong, all these years later! (I sometimes like listening to talk radio when I craft, if there's anything good on.)
The "tower shelf" beside the cubbies is something that was formerly on the clay table, but now it's a hold-all for various and assorted craft supplies. Pencils, paintbrushes, crayons, paint, glitter, magnets, etc.
I'm not completely sure I'll keep the area to the right of the cubby storage arranged as it is now. I like having room to the right of my sewing machine for things like pins, paper/notes, scissors/snips, etc.-- but I'm not sure this is the most efficient/effective use of the space. It can be tweaked. (Maybe some storage/shelves hanging on the wall right there? That would leave the table top free...)
After deciding to rearrange the furniture, I looked for an arrangement that would allow room for a quilt design wall. A design wall is basically any vertical surface covered with (usually) either batting or flannel. Cotton fabric tends to stick to these materials, so you can easily rearrange and view quilt blocks, fabric swatches, etc. from a distance. A design wall can be as simple as a piece of fabric/batting hung on a wall, but many people cover foam boards/insulation board, which means you can also push pins into the board (if a piece won't stick on its own).
Donald helped me make mine from foam insulation board that we covered with grey flannel (which I had to seam to get to the right size). We used a spray adhesive to attach the flannel to the front. All I'll say about that is that (with the spray we used, at least) you should avoid spraying directly on the fabric. A bit of spray went rogue and left a small but permanent "dark spot" on our fabric. (Which annoyed me greatly, to be honest. But I'll just keep a strategically placed piece of cotton up there to hide it.) To further secure the fabric, we duct taped it to the back.
To hang the design wall, Donald found the studs in the wall where we wanted it, measured to locate where the bottom edge would be, and hammered a nail in each stud along that edge. This gives the foam board something to rest on, supporting its weight. We then put pieces of strong, double-sided mounting tape (the type with a foam center) here and there around the back of the design wall, got it into position (resting on the row of nails), and pressed it against the wall. ...I really don't think it's going anywhere.
On the left side of this photo, you can see the stereo and a hand-me-down shelving unit I use to store more yarn. Both are standing on a shelving unit where I keep beading supplies and crochet thread.
Here's another view of the new design wall (which seems to work very well so far!), as well as the doors to the long closet that runs along one wall of the room. Plenty of storage in there, too, of course. I chose to site the design wall perpendicular to the "closet wall" to make use of space that would otherwise be wasted. Furniture can't be placed too close to that corner, because it interferes with the closet door, but the design wall fits just fine, and since the closet is usually closed, it doesn't block the design wall.
(The canine companion in some of these photos is Luna the American Eskimo Dog.)
Looking further along the "closet wall", you can see the door into the room. This little nook could easily be wasted space, but I've done my best to make it useful. There's a bulletin board on one side of the nook (behind the door, when it's opened).
On the adjacent wall is a storage cabinet, the surface of which fits a small shelf and some boxes-- the home of the rest of my thread crochet stash.
On the remaining wall (the wall with the door into the room), I placed the large metal shelving unit, which houses mainly fabric, but also yarn, sewing thread, knitting needles, my old sewing machine, craft paints, and various odds and ends.
Next along that wall, there's a smaller table. This is where I'll keep the small ironing board and my polymer clay supplies/tools. When I want to do clay, I'll probably move the ironing board to the other tables and work here. It's not a huge space, but I'm sure it will suffice.
The little clay-dedicated toaster oven can also be moved, of course. Actually, I may find another spot for that, anyway. The ironing board is a bit cramped, as things stand, and I'm sure I can find another place to tuck the oven away until it's needed.
In the last corner of the room stands the desk and hutch-- one of only a couple of pieces of furniture in the room that didn't move an inch. This is where I keep books and all sorts of bits and pieces-- everything from crochet hooks and knitting needles to hot glue sticks and ribbon. I don't use it as a desk, so the spot where a chair would normally go can also be used as storage-- at the moment, for a hat box and a throw pillow.
I think that just about covers it (short of giving sneak peeks into the messy closet and crowded drawers)! I'm enjoying putting on the finishing touches, and I'm looking forward to sitting down at the sewing machine to see how the new layout feels.
It's a cozy, comfortable room and feels all the more homey after the clean-up that came with the rearranging.
I'm so excited to have a design wall, too! Now that I have my very own Quilt Design Wall, I really need to start sewing more and living up to it. ;o)
To close, here are a few more photos of Luna, who wondered why I was taking dull photos inside the house. (She knows that when I get the camera, it usually means I'm going outside, which is a super fun time for the dogs, who LOVE being outside with The People.)
~~SIGH~~
Sooooo boooooooooooring....
. . . going into an ennui-induced trance . . .