I've completed my first "real" quilt!
(Though I like them, "rag quilts" aren't the same, in my opinion, as a REAL quilt. I've made a few rag quilts, but this is the first blanket I've sewn with a pieced top, a backing, batting, quilting, and binding.)
I don't want to admit how long it took me, from start to finish-- so I won't! Mom put together the kit for this string quilt years ago, as a birthday present. It sat for a while until I decided I was brave enough to start working on it. It's been a big learning experience, and as I approached each new step (joining blocks into strips, joining strips, making the "quilt sandwich", pin basting, machine quilting, binding), it went into time-out until I could muster up the courage for whatever came next.
No wonder it's taken so long!
But now that I have this little quilt under my belt, I feel much more confident and excited about turning my other quilt top into a finished quilt-- and (of course) working on piecing the next quilt top! (Building the quilt top is definitely the most fun part of the process for me. I enjoyed seeing the blanket come to completion, but the piecing was much more fun than the basting and quilting.)
Here are a few lessons, off the top of my head, that I'll take away from this experience:
--Polyester batting doesn't shrink with washing-- or at least doesn't shrink as much as cotton or cotton-blend batting can. (Cotton shrinks the most, apparently.) Batting shrinkage is what gives some quilts much of their "crinkled" look (though the quilting itself does some of it). I like the crinkled look, so I'll be interested to try something different, another time. (This quilt's batting is 100% polyester, because I already had it, and it was the right size.)
--While assembling the quilt sandwich, it was easier to work on the vinyl floor than on wall-to-wall carpet. For one thing, the pins caught the carpet a few times. For another, on the vinyl, I could more easily (and securely) tape down the backing. (Always tape down the backing.)
--If at all possible, make a tiny "quilt sandwich" of extra materials, to test the settings for stitch length, etc.
--Don't forget to increase the stitch length setting on the sewing machine when quilting. I increased from 2.5 to 3.5, this time, and I wish I had increased it even further, or at least tested it at a higher setting.
--Machine quilting tires out my shoulders! Take it slow and easy, and don't expect to do it all in one session-- maybe not even all in one day, depending on the size of the blanket.
--It is very easy for the quilt to get hung up-- to weigh down-- to pull against the machine when quilting on a small, domestic sewing machine. You might not notice right away, except that the stitches start getting too small/short. Stop and adjust even more frequently than you think you need to, until you get into The Zone. ;o)
--When machine quilting, it is best to start in the middle and work your way out (first one side, then the other). This time, I tried to cheat a bit by starting in the middle, then going out in larger increments (stitching in the ditch down each column), and finally going back to fill in the blocks with lines of quilting. No, that was not a good idea. (The quilt started puckering in a very unpleasant way.) I ended up wasting lots of time-- picking out a few lines of quilting, repinning that section (as well as I could), and sewing it again. Next time, I'll know better!
--I still need to work on my binding skills. I have a tendency to pull the binding too far when I'm preparing to attach it to the back, which left the binding a little on the short side on the quilt front, this time. It's okay, but I'd like a more even look, next time. Maybe it would be a good idea to start with a 2.5" strip of fabric next time, instead of the even 2" I used for this quilt. At least I could pin a scrap of fabric in place to get a feel for how it will look, before I decide one way or the other.
I'm sure there were more lessons, but that'll do. ;o)
Now for some photos!
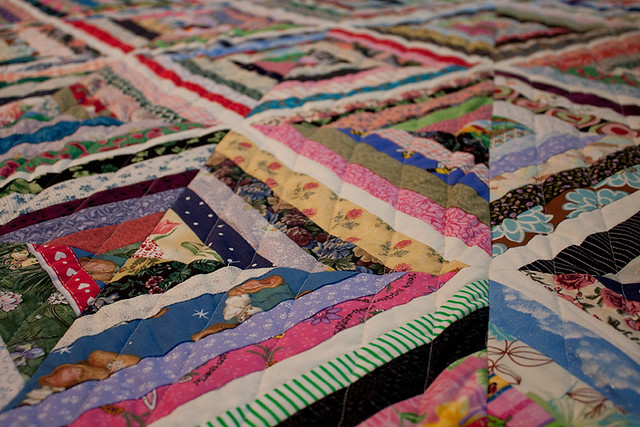
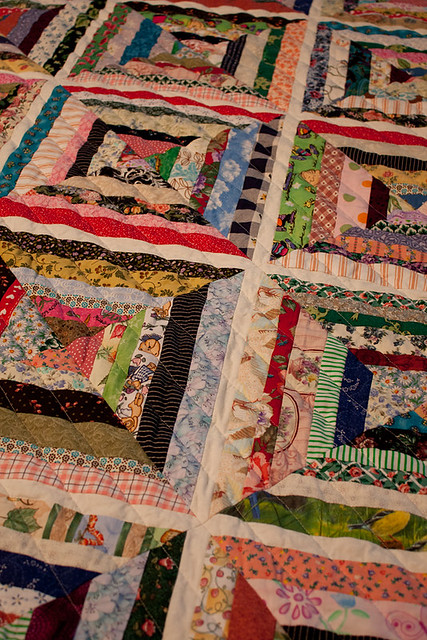
Here it is after pin-basting. I used a broken nut pick (the kind that comes with a nut cracker) as a makeshift "Kwik Klip" tool. It worked pretty well, but I might try to cover part of it with polymer clay before basting my next quilt. A small crochet hook might also work well, though I'd want to use one I didn't particularly care about, because using it this way might scratch and mar the finish, making it less useful for crocheting. (Or you could just buy the real thing. They're less than $10, so not a huge investment, but hey, that's money that could go toward fabric, batting, or some other, more exciting tool/notion!)
For future reference, the batting is Poly-Fil Traditional Batting, 100% polyester-- only thecheapest best for my first real quilt. ;o) Hey, it's non-allergenic and made in the USA! But seriously, it worked just fine, and based on the few reviews I've read, it sounds like it should hold up pretty well. I'm satisfied, so far.
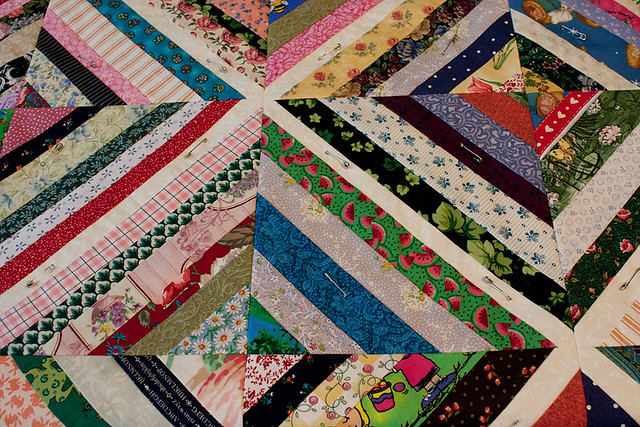
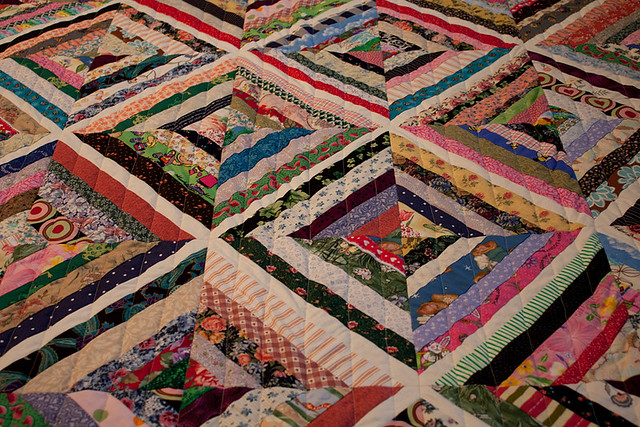
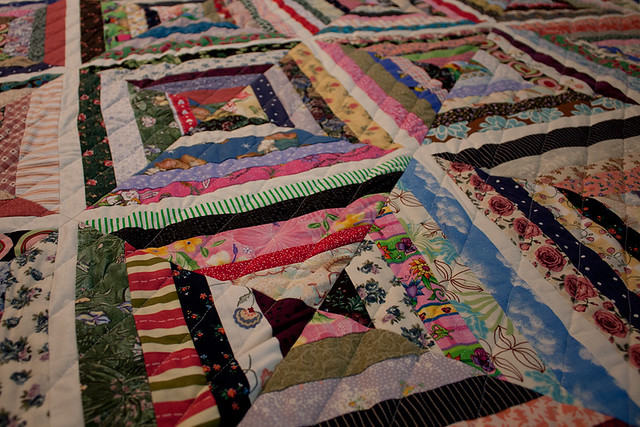
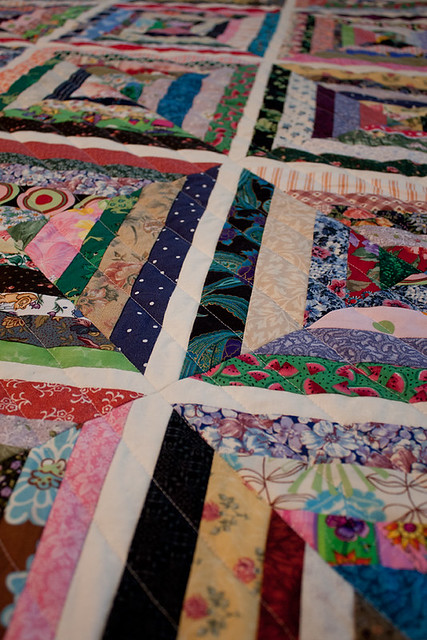
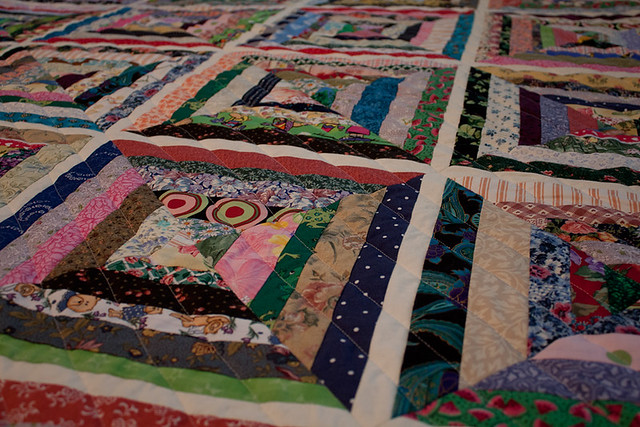
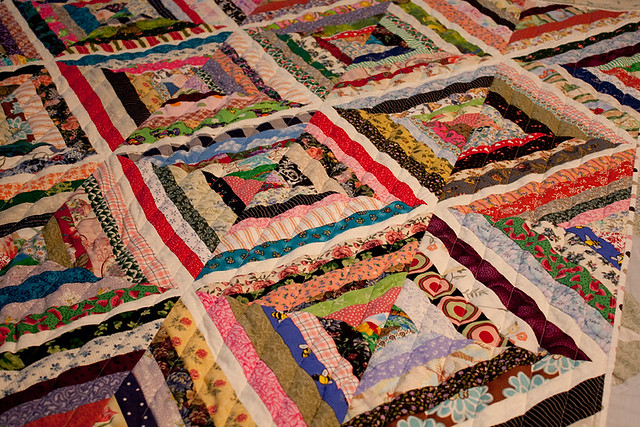
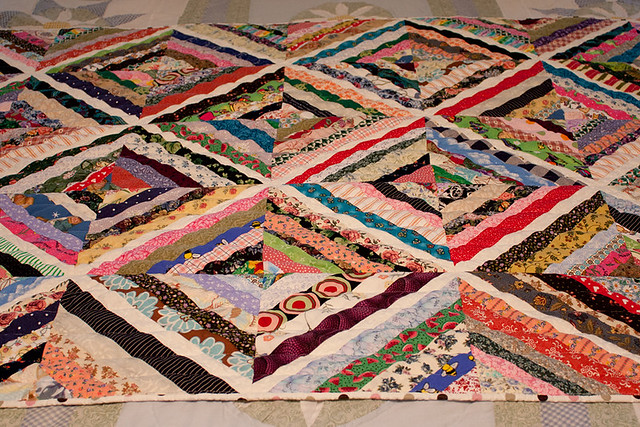
Here it is all ready to quilt!
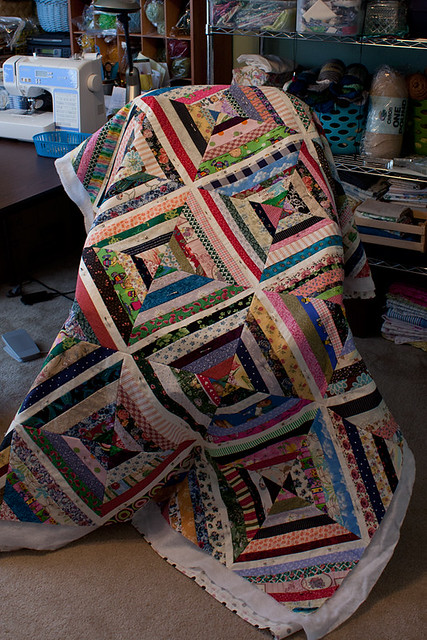
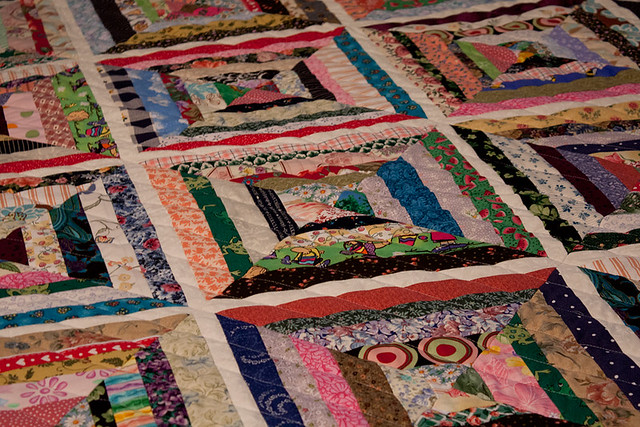
So then I quilted it (straight lines on the sewing machine), trimmed the excess batting and backing, and made and applied the binding (from the same fabric as the backing).
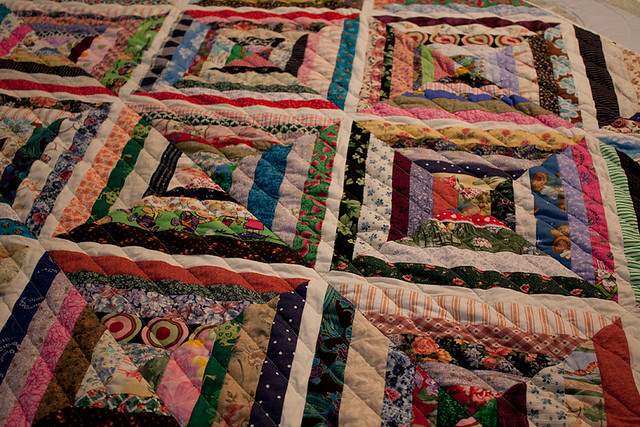
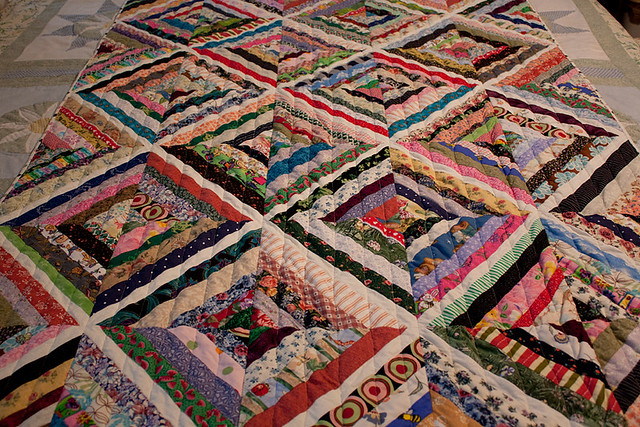
Because I wasn't sure how much it might "change" (crinkle, shrink, bleed) after washing and drying, I decided to take some "before" photos. I ended up with quite a few of them...
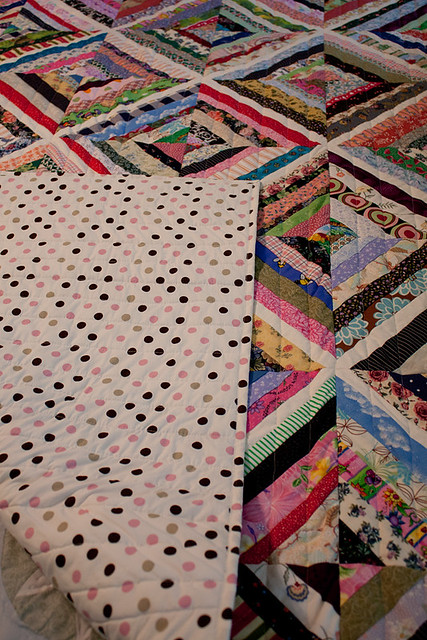
Here it is with one corner flipped back to show the backing, which is a polka-dotted sheet passed along to me from Mom. :o)
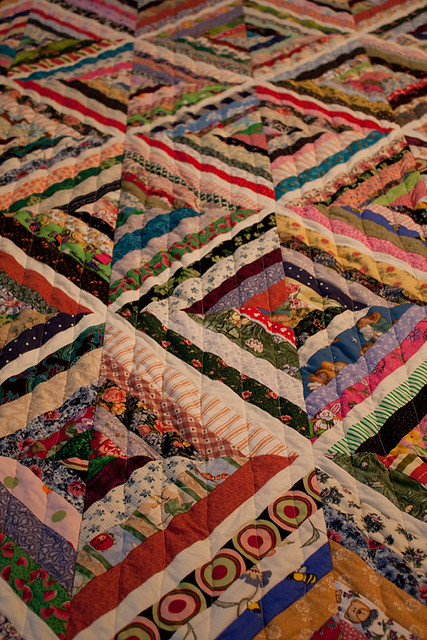
After its trip through the washer and dryer, it was ready for another quick photo shoot. (I really need to find a better way to photograph blankets-- both quilts and afghans... I'm taking the lazy way out, lately; they could look so much better!)
As you can see, it didn't change a whole lot after washing/drying, but maybe there is a slight increase in "crinkliness"... Quilting it more densely would also have made a difference, wouldn't it? But of course, the more it crinkles/shrinks, the smaller the quilt becomes. (g) I guess you need to take all that into consideration, if you're particular about the finished size...

So there it is, my first REAL quilt! I know it's not perfect, but I'm happy with it, and I'm looking forward to snuggling under it when the weather turns cooler.
Now that I know I can make something resembling a quilt, I'm excited to try it again!
(Though I like them, "rag quilts" aren't the same, in my opinion, as a REAL quilt. I've made a few rag quilts, but this is the first blanket I've sewn with a pieced top, a backing, batting, quilting, and binding.)
I don't want to admit how long it took me, from start to finish-- so I won't! Mom put together the kit for this string quilt years ago, as a birthday present. It sat for a while until I decided I was brave enough to start working on it. It's been a big learning experience, and as I approached each new step (joining blocks into strips, joining strips, making the "quilt sandwich", pin basting, machine quilting, binding), it went into time-out until I could muster up the courage for whatever came next.
No wonder it's taken so long!
But now that I have this little quilt under my belt, I feel much more confident and excited about turning my other quilt top into a finished quilt-- and (of course) working on piecing the next quilt top! (Building the quilt top is definitely the most fun part of the process for me. I enjoyed seeing the blanket come to completion, but the piecing was much more fun than the basting and quilting.)
Here are a few lessons, off the top of my head, that I'll take away from this experience:
--Polyester batting doesn't shrink with washing-- or at least doesn't shrink as much as cotton or cotton-blend batting can. (Cotton shrinks the most, apparently.) Batting shrinkage is what gives some quilts much of their "crinkled" look (though the quilting itself does some of it). I like the crinkled look, so I'll be interested to try something different, another time. (This quilt's batting is 100% polyester, because I already had it, and it was the right size.)
--While assembling the quilt sandwich, it was easier to work on the vinyl floor than on wall-to-wall carpet. For one thing, the pins caught the carpet a few times. For another, on the vinyl, I could more easily (and securely) tape down the backing. (Always tape down the backing.)
--If at all possible, make a tiny "quilt sandwich" of extra materials, to test the settings for stitch length, etc.
--Don't forget to increase the stitch length setting on the sewing machine when quilting. I increased from 2.5 to 3.5, this time, and I wish I had increased it even further, or at least tested it at a higher setting.
--Machine quilting tires out my shoulders! Take it slow and easy, and don't expect to do it all in one session-- maybe not even all in one day, depending on the size of the blanket.
--It is very easy for the quilt to get hung up-- to weigh down-- to pull against the machine when quilting on a small, domestic sewing machine. You might not notice right away, except that the stitches start getting too small/short. Stop and adjust even more frequently than you think you need to, until you get into The Zone. ;o)
--When machine quilting, it is best to start in the middle and work your way out (first one side, then the other). This time, I tried to cheat a bit by starting in the middle, then going out in larger increments (stitching in the ditch down each column), and finally going back to fill in the blocks with lines of quilting. No, that was not a good idea. (The quilt started puckering in a very unpleasant way.) I ended up wasting lots of time-- picking out a few lines of quilting, repinning that section (as well as I could), and sewing it again. Next time, I'll know better!
--I still need to work on my binding skills. I have a tendency to pull the binding too far when I'm preparing to attach it to the back, which left the binding a little on the short side on the quilt front, this time. It's okay, but I'd like a more even look, next time. Maybe it would be a good idea to start with a 2.5" strip of fabric next time, instead of the even 2" I used for this quilt. At least I could pin a scrap of fabric in place to get a feel for how it will look, before I decide one way or the other.
I'm sure there were more lessons, but that'll do. ;o)
Now for some photos!
Here it is after pin-basting. I used a broken nut pick (the kind that comes with a nut cracker) as a makeshift "Kwik Klip" tool. It worked pretty well, but I might try to cover part of it with polymer clay before basting my next quilt. A small crochet hook might also work well, though I'd want to use one I didn't particularly care about, because using it this way might scratch and mar the finish, making it less useful for crocheting. (Or you could just buy the real thing. They're less than $10, so not a huge investment, but hey, that's money that could go toward fabric, batting, or some other, more exciting tool/notion!)
For future reference, the batting is Poly-Fil Traditional Batting, 100% polyester-- only the
Here it is all ready to quilt!
So then I quilted it (straight lines on the sewing machine), trimmed the excess batting and backing, and made and applied the binding (from the same fabric as the backing).
Because I wasn't sure how much it might "change" (crinkle, shrink, bleed) after washing and drying, I decided to take some "before" photos. I ended up with quite a few of them...
Here it is with one corner flipped back to show the backing, which is a polka-dotted sheet passed along to me from Mom. :o)
After its trip through the washer and dryer, it was ready for another quick photo shoot. (I really need to find a better way to photograph blankets-- both quilts and afghans... I'm taking the lazy way out, lately; they could look so much better!)
As you can see, it didn't change a whole lot after washing/drying, but maybe there is a slight increase in "crinkliness"... Quilting it more densely would also have made a difference, wouldn't it? But of course, the more it crinkles/shrinks, the smaller the quilt becomes. (g) I guess you need to take all that into consideration, if you're particular about the finished size...
So there it is, my first REAL quilt! I know it's not perfect, but I'm happy with it, and I'm looking forward to snuggling under it when the weather turns cooler.
Now that I know I can make something resembling a quilt, I'm excited to try it again!