Time for a project update!
Craft-time has focused mainly on the Ogee Afghan, for the past several weeks.
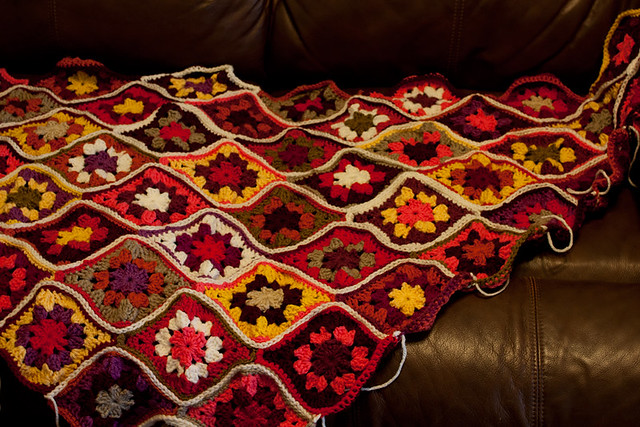
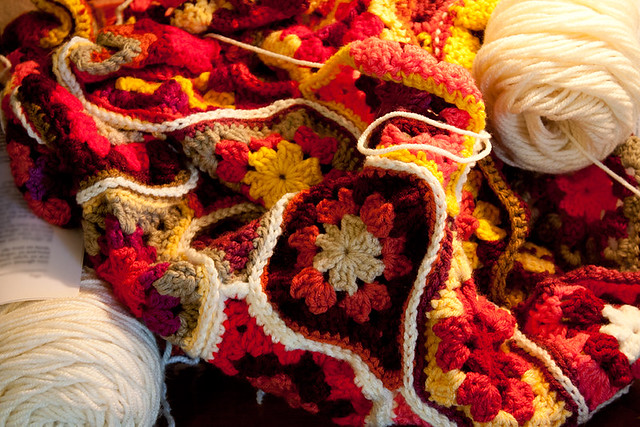
I've decided I finally have enough motif strips and have begun joining them using the "zipper method".
Next, there's the border to consider. I think I'll keep the border very simple (and probably fairly narrow) on this afghan, but that depends on how it looks when the time comes.
Here are a couple of photos of the joining process:
In between motifs, I've done a few other small-scale crafty things.
I hemmed a couple of sets of (store-bought) curtains. We've been using them for a while, but one set needed hemming because the fusible tape (applied in lieu of stitching) was coming loose, and I wanted to hem the other set because I was tired of having them at "pooling" length. (Pooled curtains just aren't practical with two long-haired indoor dogs and the resultant pet-hair tumbleweeds.)
Then there were three small throw pillows to whip up to fit some simple slip-covers I made months and months ago. They're really too simple to bother photographing, but it always feels good to finally finish a stalled-out project.
I also made a pillow to go outside on one of our (molded plastic) Adirondack chairs. I tried to tailor it to the chair, with straps that go around and snap into place to hold it right where we'd want it (behind the head). After giving it a test run, I think it would work just as well to make a simple elongated rectangle with no straps at all, so that's probably what I'll do for the second one-- if I don't just borrow a small pillow off the couch, instead. (g) Oh well, live and learn. At least it was free fabric, so I didn't waste any special materials on that first pillow-- and it will work well enough. I just needn't have fussed so much over it.
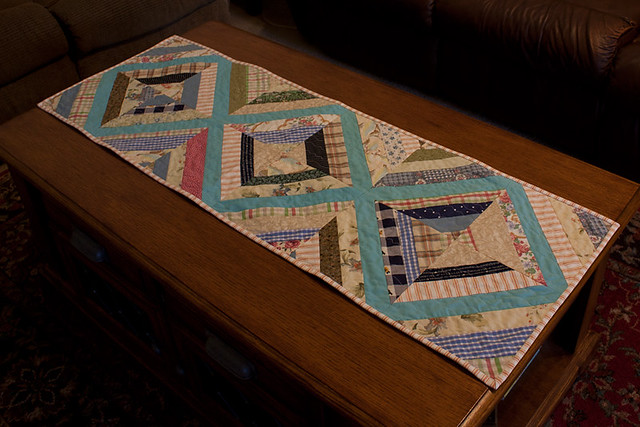
I have a couple of quilt tops-- one finished and another nearly so. The next step will be making the backings, selecting batting, and then putting them all together. To practice a little for that, I thought (months and months ago) that I'd try my hand at binding a smaller project-- a table runner.
I used some scraps to make several string blocks, then joined them and made a roughly pieced-together backing. Since it's just a table runner-- and because it was already three layers thick (since I used a foundation square of fabric for each string block)-- I forewent the batting and jumped straight to pin-basting and machine-quilting the top and back together.
You wouldn't think that basting a small table runner would present much of a challenge, but I managed to find a way to mess it up. I used safety pins, which was good. What was not so good was that I pinned with the backing facing up. That would be okay if you didn't care which side was facing up when you did the sewing, but I wanted to see the quilt top as I sewed (to help me judge how to place my stitching), and it would have been difficult to remove the safety pins as I sewed, if they were under the "quilt sandwich". ...So I had to take out the pins, flip everything over, and pin them again. (Should I even admit to such scatterbrained mistakes? (g))
With the pin-basting done, it was time to try machine quilting on my domestic sewing machine. I decided to play it safe, this time, and stick with one of the built-in decorative stitches on my machine. (Someday, I'd like to try free-motion quilting, but I need to work up some confidence...)
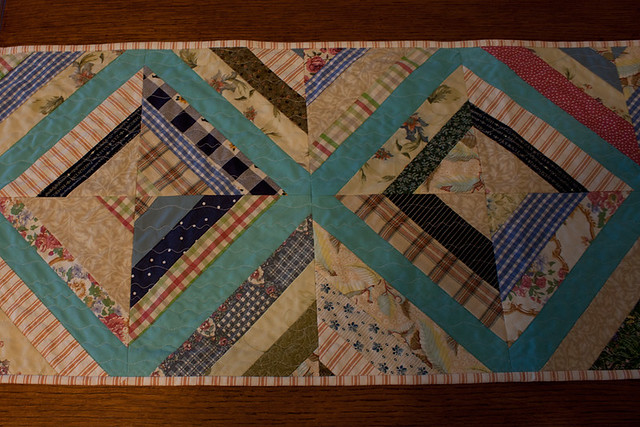
I used a wavy line stitch set to varying stitch lengths-- varying from "row" to row of quilting, but never within a row. It's surprising how different the same stitch can look, depending on the stitch length and width settings. It's definitely worth playing around with some scraps to fine-tune and get just the right setting for your project!
Sewing a straight line is apparently also something I can mess up. ;o) I think it worked out ok, but next time, I'll take things more slowly, maybe use the quilting guide thingy that came with my sewing machine, and probably try to find a better visual guide in my fabric than just the previous line of quilt-stitching (which tends to disappear into some fabrics). There are probably plenty of helpful tips online, so maybe I'll watch a couple more videos before next time, too.
In any case, I learned how to put on and use the walking foot (which came with the machine)-- and I also learned how to make and apply a binding.
For future reference, two online sources helped with the binding: First, I read this photo tutorial from Pretty Prudent. Then I watched this video from The Crafty Gemini. They have slightly different ways of doing things, and I ended up using a combination of the two. Specifically, I handled the corners as The Crafty Gemini showed, but I used Pretty Prudent's method of joining the two ends of the binding. Oh, and I made the binding tape extra wide, as in the tutorial from Pretty Prudent-- starting with 2.5-inch strips of fabric. I probably pulled the binding further to the back than you're supposed to, which means there's a little bit of a "loose flap" of binding tape on the back. It's not the most elegant finish ever, but that made it much easier to avoid missing the binding, so... ~shrug~ Not sure what I'll do next time, but at least I know that I can make binding of some kind.
I managed to mess up yet again, when I was joining the binding ends. (How do I do it?!) After stitching the ends together, I realized that I'd somehow twisted one of the pieces of fabric, so there was a twist in the binding tape. I picked out the stitches and sewed it back without the twist, and now I don't think anyone would ever know I'd made a mistake. (But I know it... And must live with the shame...)
The last finished project is one that's been in limbo for a very long time. The Granny's Stepdaughter Pillows have been waiting and waiting for their pillow inserts. Making pillow inserts isn't difficult, but it's one of those things that I don't really love doing, so I end up putting them off forever.
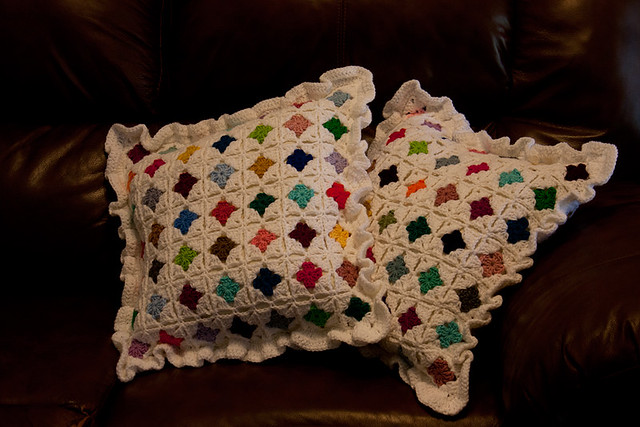
This time, I left the pillow covers open on one side, so they'll be removable for easier washing. I stitched a row of chunky polymer clay buttons to the inside edge of one panel, and they fit right through the "natural" holes of the granny squares on the other panel. (You can catch just a peek at them them in one of the photos below.)
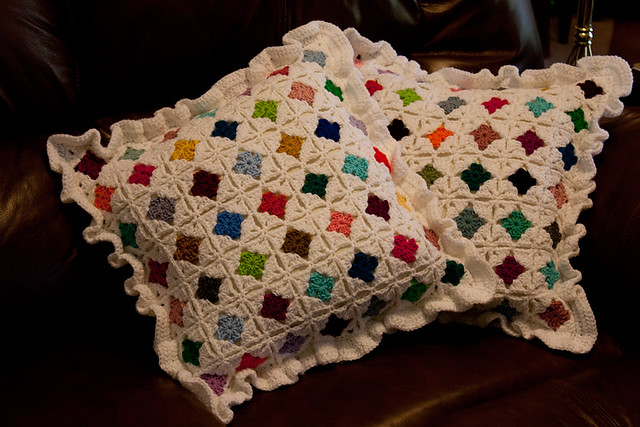
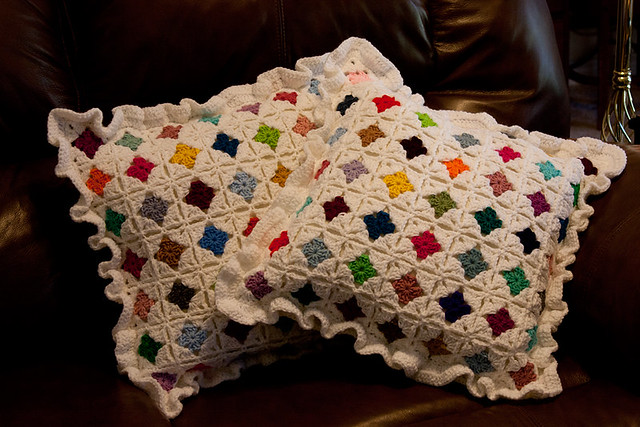
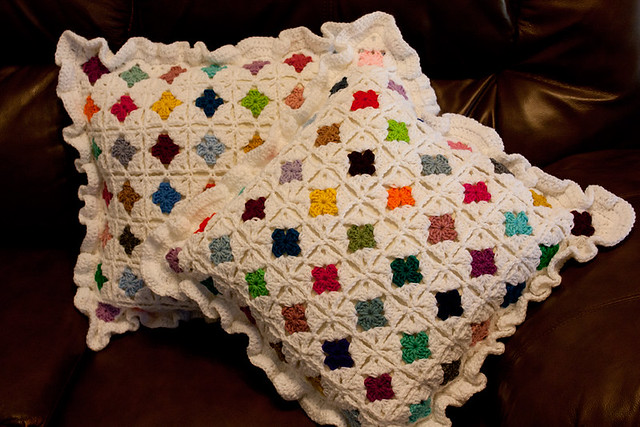
The photos aren't the very best, I'm afraid. They may make some of the darker colors look darker than they really are, and the pillows look a little more cream than white-- but they get the idea across.
So glad to scratch a few projects off my list! There are several more works-in-progress that need just a little more work to reach completion...
Craft-time has focused mainly on the Ogee Afghan, for the past several weeks.
I've decided I finally have enough motif strips and have begun joining them using the "zipper method".
Next, there's the border to consider. I think I'll keep the border very simple (and probably fairly narrow) on this afghan, but that depends on how it looks when the time comes.
Here are a couple of photos of the joining process:
- - - - - - -
In between motifs, I've done a few other small-scale crafty things.
I hemmed a couple of sets of (store-bought) curtains. We've been using them for a while, but one set needed hemming because the fusible tape (applied in lieu of stitching) was coming loose, and I wanted to hem the other set because I was tired of having them at "pooling" length. (Pooled curtains just aren't practical with two long-haired indoor dogs and the resultant pet-hair tumbleweeds.)
Then there were three small throw pillows to whip up to fit some simple slip-covers I made months and months ago. They're really too simple to bother photographing, but it always feels good to finally finish a stalled-out project.
I also made a pillow to go outside on one of our (molded plastic) Adirondack chairs. I tried to tailor it to the chair, with straps that go around and snap into place to hold it right where we'd want it (behind the head). After giving it a test run, I think it would work just as well to make a simple elongated rectangle with no straps at all, so that's probably what I'll do for the second one-- if I don't just borrow a small pillow off the couch, instead. (g) Oh well, live and learn. At least it was free fabric, so I didn't waste any special materials on that first pillow-- and it will work well enough. I just needn't have fussed so much over it.
- - - - - - -
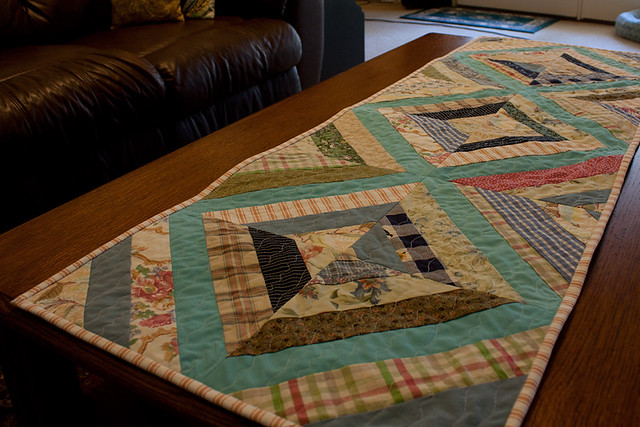
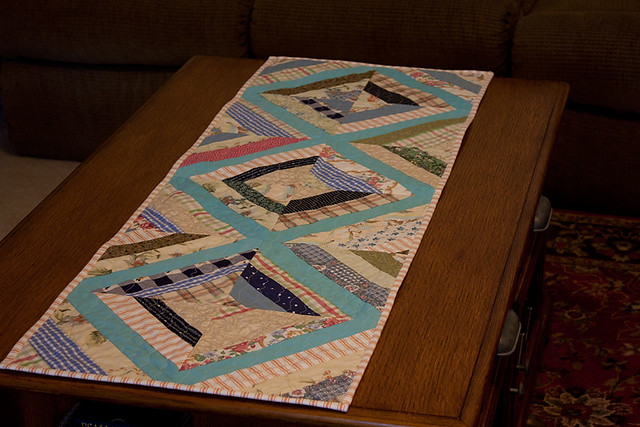
I have a couple of quilt tops-- one finished and another nearly so. The next step will be making the backings, selecting batting, and then putting them all together. To practice a little for that, I thought (months and months ago) that I'd try my hand at binding a smaller project-- a table runner.
I used some scraps to make several string blocks, then joined them and made a roughly pieced-together backing. Since it's just a table runner-- and because it was already three layers thick (since I used a foundation square of fabric for each string block)-- I forewent the batting and jumped straight to pin-basting and machine-quilting the top and back together.
You wouldn't think that basting a small table runner would present much of a challenge, but I managed to find a way to mess it up. I used safety pins, which was good. What was not so good was that I pinned with the backing facing up. That would be okay if you didn't care which side was facing up when you did the sewing, but I wanted to see the quilt top as I sewed (to help me judge how to place my stitching), and it would have been difficult to remove the safety pins as I sewed, if they were under the "quilt sandwich". ...So I had to take out the pins, flip everything over, and pin them again. (Should I even admit to such scatterbrained mistakes? (g))
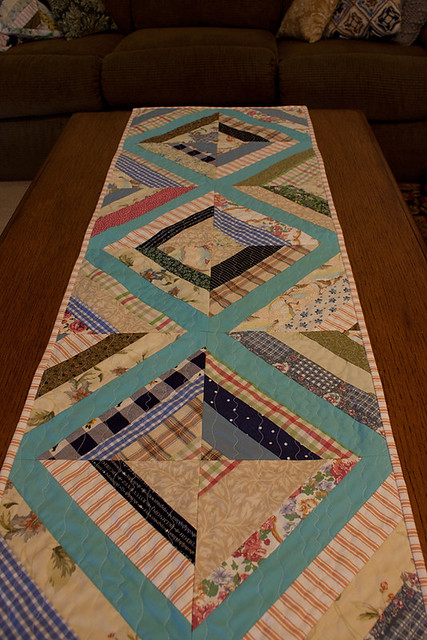
With the pin-basting done, it was time to try machine quilting on my domestic sewing machine. I decided to play it safe, this time, and stick with one of the built-in decorative stitches on my machine. (Someday, I'd like to try free-motion quilting, but I need to work up some confidence...)
I used a wavy line stitch set to varying stitch lengths-- varying from "row" to row of quilting, but never within a row. It's surprising how different the same stitch can look, depending on the stitch length and width settings. It's definitely worth playing around with some scraps to fine-tune and get just the right setting for your project!
Sewing a straight line is apparently also something I can mess up. ;o) I think it worked out ok, but next time, I'll take things more slowly, maybe use the quilting guide thingy that came with my sewing machine, and probably try to find a better visual guide in my fabric than just the previous line of quilt-stitching (which tends to disappear into some fabrics). There are probably plenty of helpful tips online, so maybe I'll watch a couple more videos before next time, too.
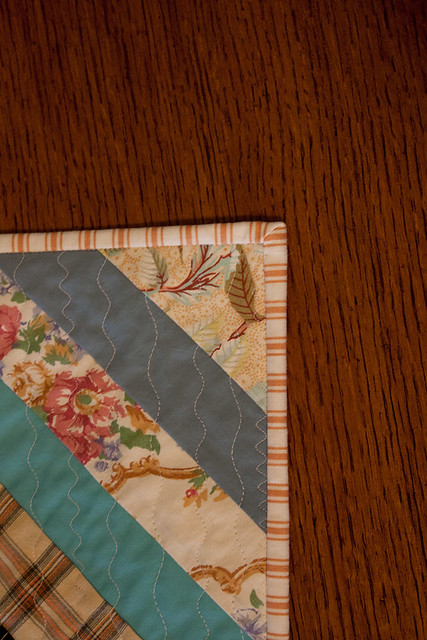
In any case, I learned how to put on and use the walking foot (which came with the machine)-- and I also learned how to make and apply a binding.
For future reference, two online sources helped with the binding: First, I read this photo tutorial from Pretty Prudent. Then I watched this video from The Crafty Gemini. They have slightly different ways of doing things, and I ended up using a combination of the two. Specifically, I handled the corners as The Crafty Gemini showed, but I used Pretty Prudent's method of joining the two ends of the binding. Oh, and I made the binding tape extra wide, as in the tutorial from Pretty Prudent-- starting with 2.5-inch strips of fabric. I probably pulled the binding further to the back than you're supposed to, which means there's a little bit of a "loose flap" of binding tape on the back. It's not the most elegant finish ever, but that made it much easier to avoid missing the binding, so... ~shrug~ Not sure what I'll do next time, but at least I know that I can make binding of some kind.
I managed to mess up yet again, when I was joining the binding ends. (How do I do it?!) After stitching the ends together, I realized that I'd somehow twisted one of the pieces of fabric, so there was a twist in the binding tape. I picked out the stitches and sewed it back without the twist, and now I don't think anyone would ever know I'd made a mistake. (But I know it... And must live with the shame...)
- - - - - - -
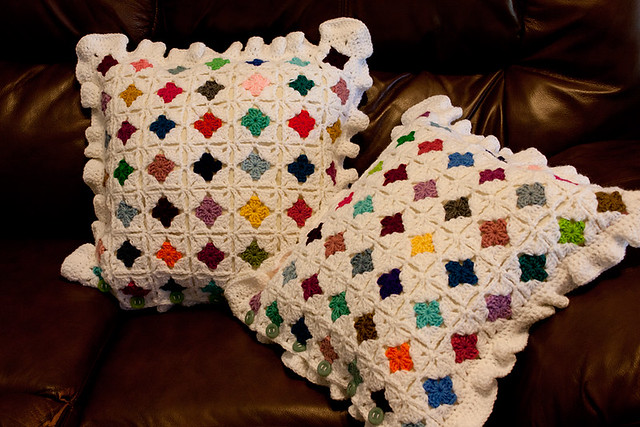
The last finished project is one that's been in limbo for a very long time. The Granny's Stepdaughter Pillows have been waiting and waiting for their pillow inserts. Making pillow inserts isn't difficult, but it's one of those things that I don't really love doing, so I end up putting them off forever.
This time, I left the pillow covers open on one side, so they'll be removable for easier washing. I stitched a row of chunky polymer clay buttons to the inside edge of one panel, and they fit right through the "natural" holes of the granny squares on the other panel. (You can catch just a peek at them them in one of the photos below.)
The photos aren't the very best, I'm afraid. They may make some of the darker colors look darker than they really are, and the pillows look a little more cream than white-- but they get the idea across.
- - - - - - -
So glad to scratch a few projects off my list! There are several more works-in-progress that need just a little more work to reach completion...