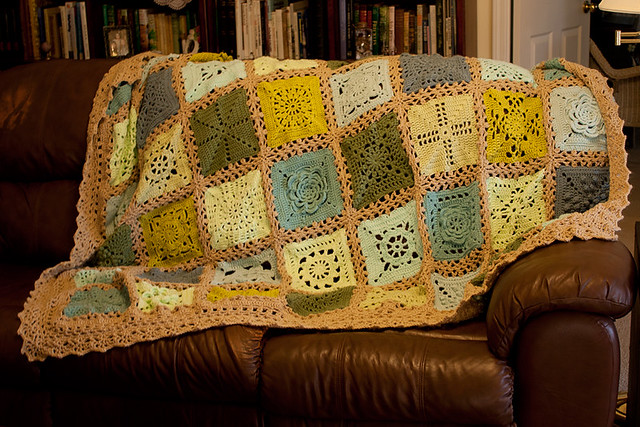
A few weeks or so ago, I finished the border, weaved in the last loose ends, and put the Old-Fashioned Sampler into the washing machine for its first bath. It's done!
I feel like the actual working-time on this afghan wasn't that long, even though the project was "open" for over two years. It's always exciting to finish a big project-- and this one's finished just in time for the main blanket season. (Well, this time of year is supposed to be blanket season, but this particular December has been unseasonably warm and humid. There are still a couple of months of potentially cool weather ahead, though.)
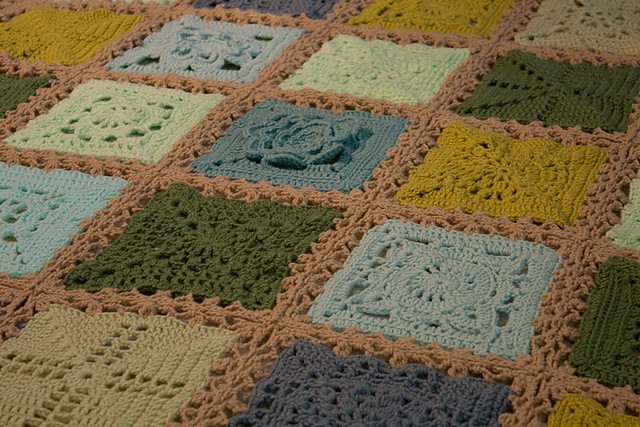
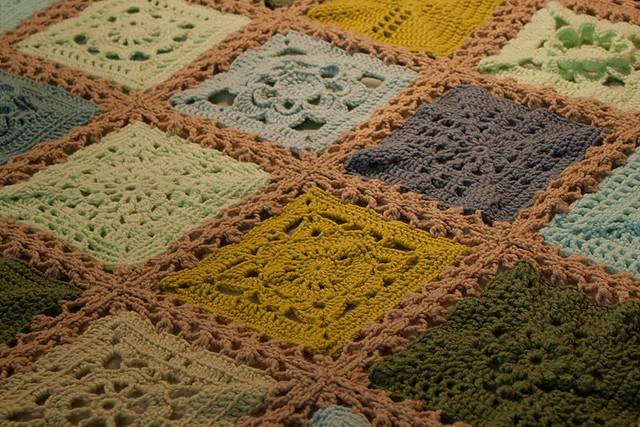
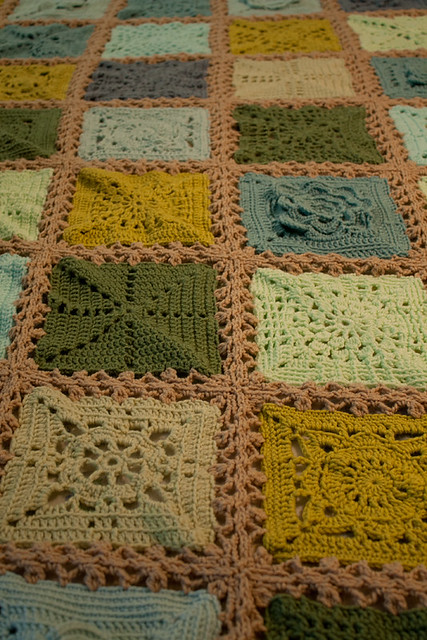
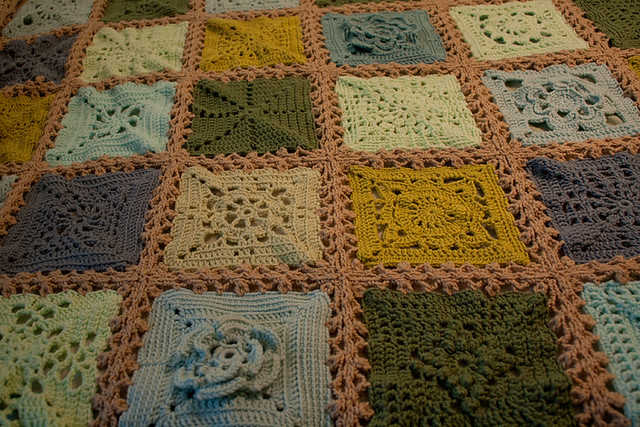
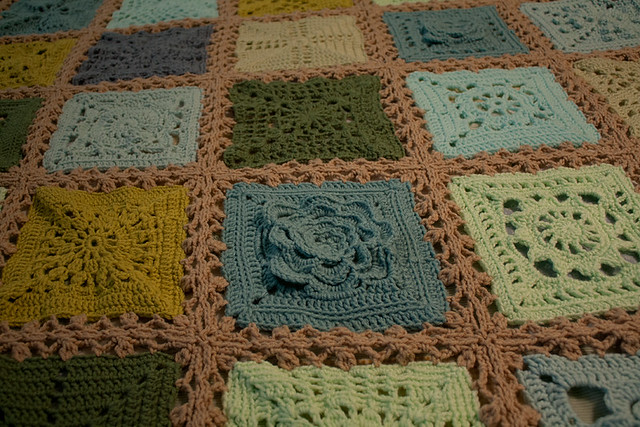
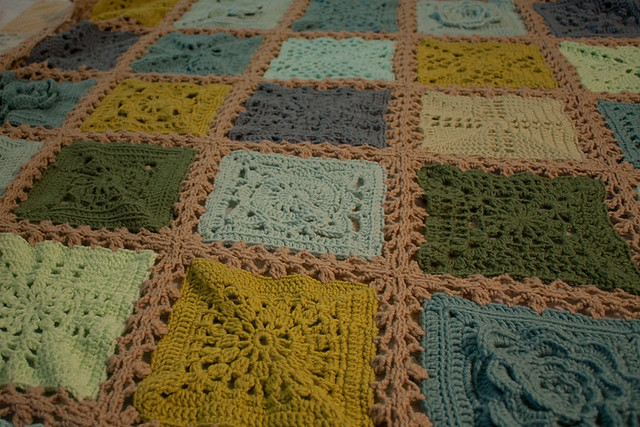
None of my photos turned out great, but they'll do, and if I work up the enthusiasm, I might take a few pictures of it in the better light outside (once it dries out enough, which might not be for a while). I had an especially difficult time getting the color adjusted on these photos. They weren't even close to correct, straight out of the camera, and adjusting them proved tricky. The photo below, for instance, is really slightly too green (on my monitor). Tone and focus issues aside, they give an idea of the finished blanket.
Pattern:
There wasn't one for the whole blanket, really. It's based on Sandra's (Cherry Heart's) scrumptious Sampler Blankie, which uses an assortment of squares from the book 200 Crochet Blocks, by Jan Eaton. I have the book, too, so I followed her example.
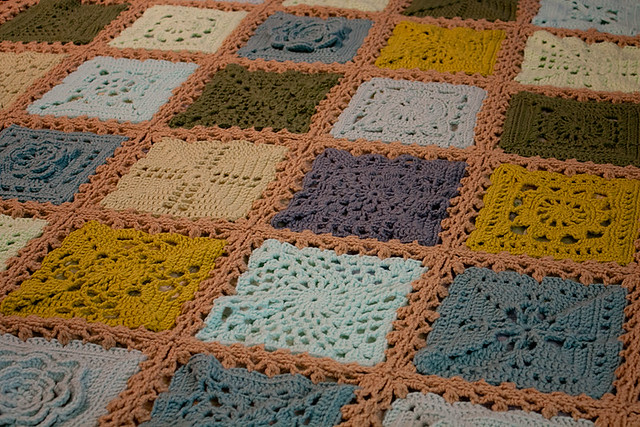
Each block is worked in a single color, which really speeds up the process. Because there would be no color changes within each square, I chose blocks with lots of texture and in some cases added even more texture by working in the back loop only, for certain rounds. I made two of some of my favorite blocks. (There's a list of the specific blocks used on my Ravelry project page.)
I'm mostly happy with how my squares turned out, though there are a few where the "row-up bumps" (the spot where you slip stitch to join the round and then chain up to the next level) are very obvious. Once, that wouldn't have bothered me; these days, it strikes me as a slight imperfection. If I were doing those squares again, I might consider using the seamless join. That does necessitate the weaving-in of many more ends, but for the more solid squares, where joins tend to really show up, it might be worth a few more minutes of work. That said, I think they blend in well enough when you're looking at the blanket as a whole. No biggie.
Joining and Edging:
For the join and border, I followed Sandra's notes.
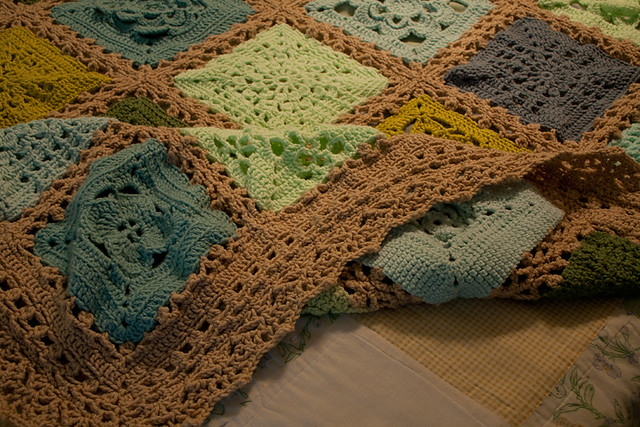
The join is explained in detail in this blog post. It's a lacy join-as-you-go method, with instructions for how to evenly distribute your stitches across squares with slightly different stitch-counts. This was my first time using pins to mark where to place stitches on crochet blocks, and I was surprised at how much I liked it. I'll definitely be using the pin method again in the future, the next time I make a sampler.
For the border, see Sandra's Ravelry project notes. Her border (and mine, since I copied!) is a combination of several rounds of her own design followed by border #93 from Edie Eckman's Around the Corner book. It's a nice, thick, lacy edging that takes a fair amount of time to do, but the result is luxurious. The border also takes a lot of yarn. I ended up using most of a skein of Caron One Pound on the border alone! The join took even more-- very nearly an entire skein of One Pound.
Yarn:
I used a mix of acrylics, drawing from my stash to keep to the color palette plan. As a result, I ended up using a few different brands-- all worsted weight. (For specifics, see the Ravelry project page.)
Hook:
H (5.0mm)

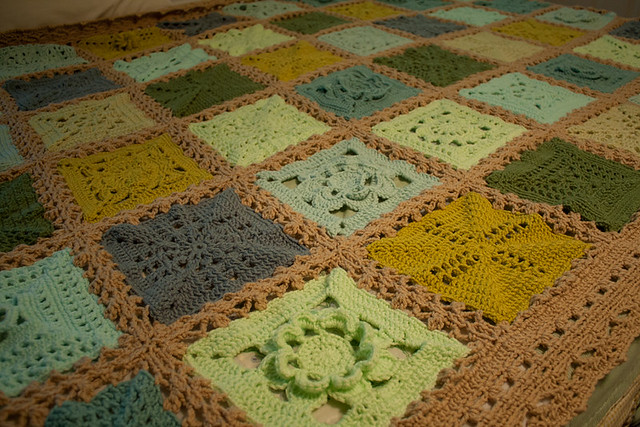
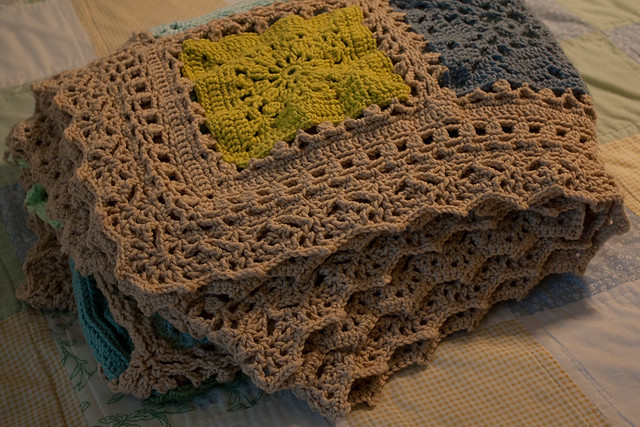
I crocheted the border without really stopping to look at the blanket as a whole, as I worked. I was in the crochet zone, you know. ;o) Anyway, I wish I had looked, because for some reason the corners of that thick border feel a little too tight for the blanket. (And there's no way I'm unraveling and redoing that whole border. Nope. No way. Not a chance.) If I try to get the whole thing perfectly flat, the corners want to curl, unless I'm actively holding them flat. Apparently I needed a few more stitches, at some point...
It's not awful, and I doubt it'll be obvious when it's in use-- but it was still a disappointing discovery to make, when I pulled it out of the dryer (and would have been even more frustrating had this afghan been intended as a gift).
I'm considering using steam to stretch and set the corners, but I've never tried it before, and I don't have an ideal tool for steaming. My iron doesn't have a steam "boost" button, so I'll have to just sort of hover it over the fabric for a while, I guess. (g) If I do try it, I'll take before and after photos to record the results.
I feel like the actual working-time on this afghan wasn't that long, even though the project was "open" for over two years. It's always exciting to finish a big project-- and this one's finished just in time for the main blanket season. (Well, this time of year is supposed to be blanket season, but this particular December has been unseasonably warm and humid. There are still a couple of months of potentially cool weather ahead, though.)
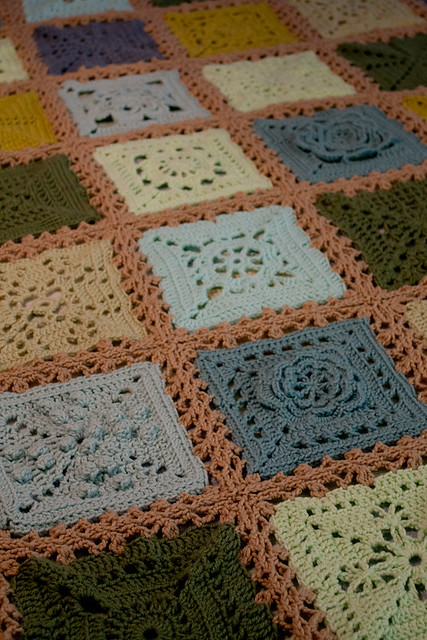
None of my photos turned out great, but they'll do, and if I work up the enthusiasm, I might take a few pictures of it in the better light outside (once it dries out enough, which might not be for a while). I had an especially difficult time getting the color adjusted on these photos. They weren't even close to correct, straight out of the camera, and adjusting them proved tricky. The photo below, for instance, is really slightly too green (on my monitor). Tone and focus issues aside, they give an idea of the finished blanket.
Pattern:
There wasn't one for the whole blanket, really. It's based on Sandra's (Cherry Heart's) scrumptious Sampler Blankie, which uses an assortment of squares from the book 200 Crochet Blocks, by Jan Eaton. I have the book, too, so I followed her example.
Each block is worked in a single color, which really speeds up the process. Because there would be no color changes within each square, I chose blocks with lots of texture and in some cases added even more texture by working in the back loop only, for certain rounds. I made two of some of my favorite blocks. (There's a list of the specific blocks used on my Ravelry project page.)
I'm mostly happy with how my squares turned out, though there are a few where the "row-up bumps" (the spot where you slip stitch to join the round and then chain up to the next level) are very obvious. Once, that wouldn't have bothered me; these days, it strikes me as a slight imperfection. If I were doing those squares again, I might consider using the seamless join. That does necessitate the weaving-in of many more ends, but for the more solid squares, where joins tend to really show up, it might be worth a few more minutes of work. That said, I think they blend in well enough when you're looking at the blanket as a whole. No biggie.
Joining and Edging:
For the join and border, I followed Sandra's notes.
The join is explained in detail in this blog post. It's a lacy join-as-you-go method, with instructions for how to evenly distribute your stitches across squares with slightly different stitch-counts. This was my first time using pins to mark where to place stitches on crochet blocks, and I was surprised at how much I liked it. I'll definitely be using the pin method again in the future, the next time I make a sampler.
For the border, see Sandra's Ravelry project notes. Her border (and mine, since I copied!) is a combination of several rounds of her own design followed by border #93 from Edie Eckman's Around the Corner book. It's a nice, thick, lacy edging that takes a fair amount of time to do, but the result is luxurious. The border also takes a lot of yarn. I ended up using most of a skein of Caron One Pound on the border alone! The join took even more-- very nearly an entire skein of One Pound.
Yarn:
I used a mix of acrylics, drawing from my stash to keep to the color palette plan. As a result, I ended up using a few different brands-- all worsted weight. (For specifics, see the Ravelry project page.)
Hook:
H (5.0mm)
I crocheted the border without really stopping to look at the blanket as a whole, as I worked. I was in the crochet zone, you know. ;o) Anyway, I wish I had looked, because for some reason the corners of that thick border feel a little too tight for the blanket. (And there's no way I'm unraveling and redoing that whole border. Nope. No way. Not a chance.) If I try to get the whole thing perfectly flat, the corners want to curl, unless I'm actively holding them flat. Apparently I needed a few more stitches, at some point...
It's not awful, and I doubt it'll be obvious when it's in use-- but it was still a disappointing discovery to make, when I pulled it out of the dryer (and would have been even more frustrating had this afghan been intended as a gift).
I'm considering using steam to stretch and set the corners, but I've never tried it before, and I don't have an ideal tool for steaming. My iron doesn't have a steam "boost" button, so I'll have to just sort of hover it over the fabric for a while, I guess. (g) If I do try it, I'll take before and after photos to record the results.