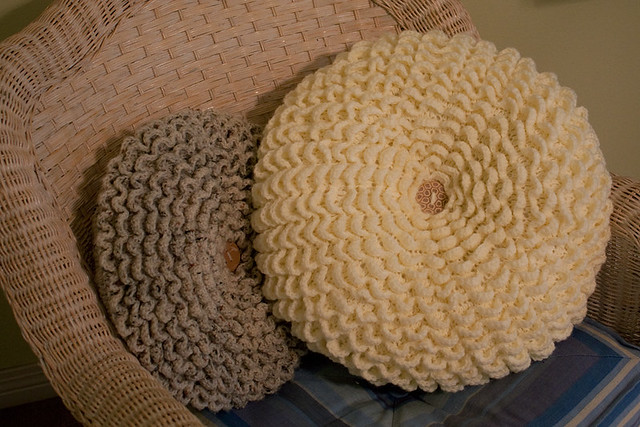
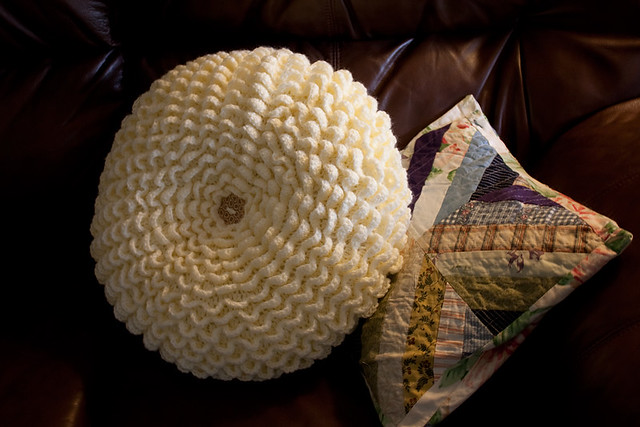
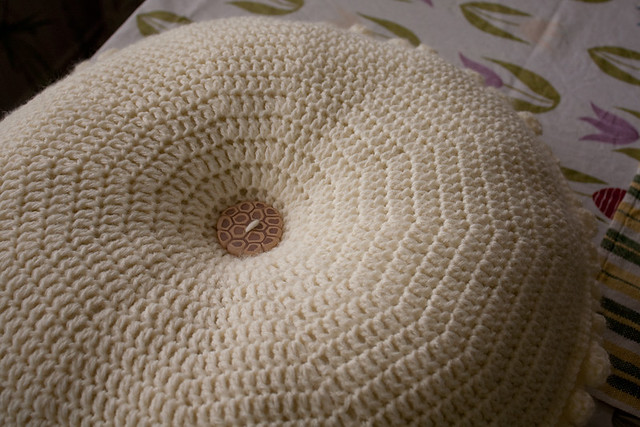
The latest crocheted pillow cover is done!
Here it is with another pillow made (years ago) using the same pattern:
Pattern:
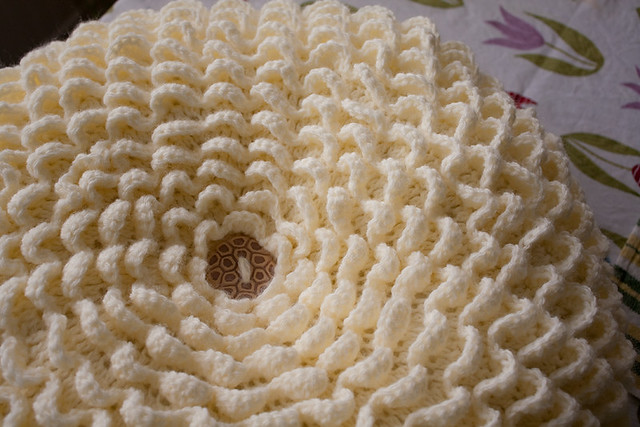
Front: Pretty Petals Potholder #9378
This pattern always seems to ripple when I make it-- too many increases, I guess. I have to fuss with it to get it flat, and it doesn't want to stay that way. However, if you're using it for a pillow cover, that doesn't matter as much, because the pillow front won't be perfectly flat, anyway.
Back: Plain flat round shape in double crochet.
Start with 12 dc in first round. Increase evenly by 12 each round. For the 13th and subsequent rounds, add another increase between the 12 you've already been making. (See this video for a demo.)
Yarn:
Lion Brand Pound of Love, "Antique White"
I used quite a bit of the skein. There's a good amount left over for the scrap basket, but I think it took at least 3/4 of the skein to crochet the front and back. (It's a pretty big pillow... About 18 inches in diameter. You can make it bigger or smaller, depending on what you want/need or the size of your pillow insert.)
Hook:
4.0mm
I made my own pillow insert because I had the "fiberfil" stuff already on hand. Pillow inserts can be pricey! If you're going to be making many pillow covers-- and if you have a sewing machine-- I think it's worth the little extra effort of making your own. (But to each her own way, of course!)
I used a piece of a cheap ($1) cream thrift store sheet-- leftovers from lining some curtains. Because I was in no mood for attention to detail, I just doubled my fabric, eyeballed the circle (which I drew on in plain old ballpoint pen ink ~gasp~), pinned it, sewed it, stuffed it, and closed the stuffing hole by hand. My pillow insert is far from perfect, but once it's covered in crochet, it really doesn't matter. (Whew!)
Confession time?
I'm really not great at making things to a specified size. Sewing a pillow to an exact finished size? Um, no thanks. (I can try, but I make no guarantees.) I'm much happier making the pillow first, then adjusting the crocheted cover to fit it. So that's what I did.
I added another couple of rounds to bring the two halves of the cover up to the right size, then joined the two circles, slipped in the insert, and finished stitching them together. (This pillow cover will not be removable, by the way. It shouldn't get very dirty, where it's headed, but when needed, I'll either hand wash or just throw the whole thing into the washing machine.)
To slightly cinch the pillow in the middle, I wanted two large buttons, so I pulled out the polymer clay supplies and made them myself. If you've never made polymer clay buttons before, you might want to check it out. It's fun, and the possibilities are endless. Size, shape, color, "style"-- all up to you.
(And there's no reason to limit yourself to buttons, either. Polymer clay can make nice, comfortable handles for crochet hooks and beads/baubles for decorative stitch markers-- and apart from craft-related objects, it's great for making so many other things, including jewelry, vessels/boxes, figures, dollhouse miniatures, and more.)
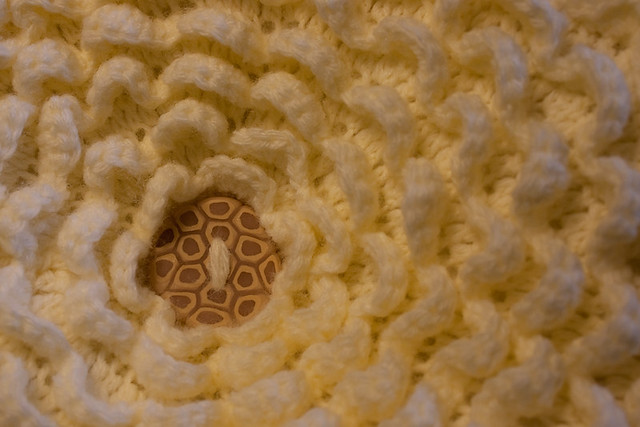
I used three colors of clay for my buttons-- translucent and a mixture of white pearl and ecru. Then I whipped up a simple cane with a translucent core wrapped in a sheet of "ecru pearl", which was in turn wrapped in another sheet of translucent. After reducing the cane (squishing and rolling it to make it thinner), I chopped it into a bunch of pieces (of relatively the same size), then stuck them together in two groups-- one per button. After flattening them out, I made the button holes and cured (baked) them. A little sanding and buffing on a piece of denim gave them a nice finish-- and they were ready for the pillow.
(I didn't get any really great close-up photos of the buttons, but I hope the basic idea comes across. I was happy with how they turned out. Kind of an organic-feeling result from an easy, fun clay session.)

With the pillow finished, I decided to bring a project out of hibernation.
This shawl went into snooze mode back in 2012. It's high time the thing was finished!
Pattern:
"Isis", designed by Anastasia Roberts
(Unfortunately, the Ravelry page says it's "temporarily unavailable"... Actually, it looks like all of her patterns are unavailable at the moment-- with most saying "no longer available", which sounds forbiddingly final. There's a note somewhere about reworking/improving some patterns, but based on comments on "Isis", that note may have been up for a while. No telling when or if these patterns will ever be put back up on Ravelry-- or elsewhere...)
Yarn:
I'm using "reclaimed" yarn from a thrift store sweater. It's a linen/cotton blend with a rustic feel-- which is why I'm calling this my "Rustic Shawl". Very creative, right? ;o)
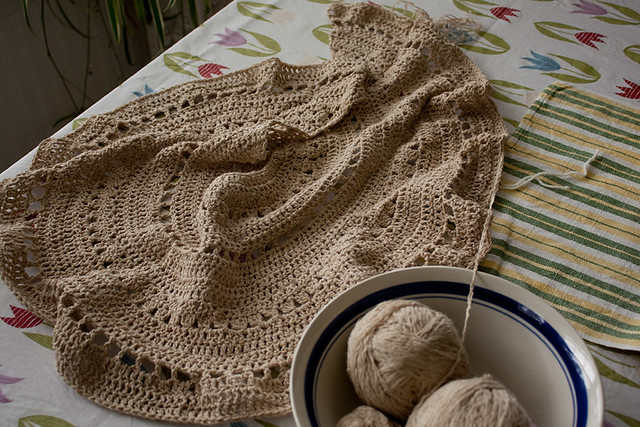
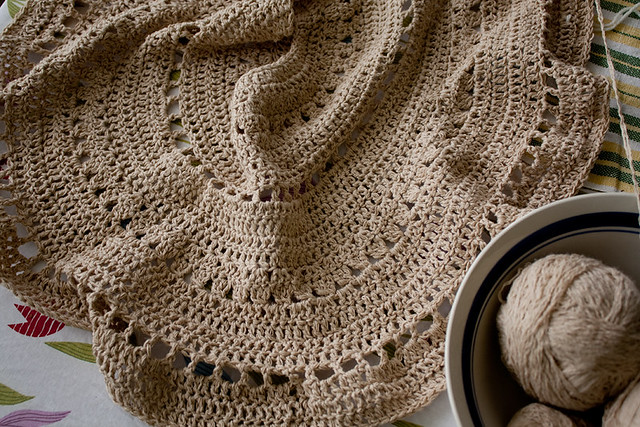
I'm adding a repeat (or is it multiple repeats? don't remember...) to increase the size of the shawl, because it was working out to be too small for my liking.
I am determined to finish the shawl, this time, so there should be photos up, sooner or later. :o)
Here it is with another pillow made (years ago) using the same pattern:
Pattern:
Front: Pretty Petals Potholder #9378
This pattern always seems to ripple when I make it-- too many increases, I guess. I have to fuss with it to get it flat, and it doesn't want to stay that way. However, if you're using it for a pillow cover, that doesn't matter as much, because the pillow front won't be perfectly flat, anyway.
Back: Plain flat round shape in double crochet.
Start with 12 dc in first round. Increase evenly by 12 each round. For the 13th and subsequent rounds, add another increase between the 12 you've already been making. (See this video for a demo.)
Yarn:
Lion Brand Pound of Love, "Antique White"
I used quite a bit of the skein. There's a good amount left over for the scrap basket, but I think it took at least 3/4 of the skein to crochet the front and back. (It's a pretty big pillow... About 18 inches in diameter. You can make it bigger or smaller, depending on what you want/need or the size of your pillow insert.)
Hook:
4.0mm
I made my own pillow insert because I had the "fiberfil" stuff already on hand. Pillow inserts can be pricey! If you're going to be making many pillow covers-- and if you have a sewing machine-- I think it's worth the little extra effort of making your own. (But to each her own way, of course!)
I used a piece of a cheap ($1) cream thrift store sheet-- leftovers from lining some curtains. Because I was in no mood for attention to detail, I just doubled my fabric, eyeballed the circle (which I drew on in plain old ballpoint pen ink ~gasp~), pinned it, sewed it, stuffed it, and closed the stuffing hole by hand. My pillow insert is far from perfect, but once it's covered in crochet, it really doesn't matter. (Whew!)
Confession time?
I'm really not great at making things to a specified size. Sewing a pillow to an exact finished size? Um, no thanks. (I can try, but I make no guarantees.) I'm much happier making the pillow first, then adjusting the crocheted cover to fit it. So that's what I did.
I added another couple of rounds to bring the two halves of the cover up to the right size, then joined the two circles, slipped in the insert, and finished stitching them together. (This pillow cover will not be removable, by the way. It shouldn't get very dirty, where it's headed, but when needed, I'll either hand wash or just throw the whole thing into the washing machine.)
To slightly cinch the pillow in the middle, I wanted two large buttons, so I pulled out the polymer clay supplies and made them myself. If you've never made polymer clay buttons before, you might want to check it out. It's fun, and the possibilities are endless. Size, shape, color, "style"-- all up to you.
(And there's no reason to limit yourself to buttons, either. Polymer clay can make nice, comfortable handles for crochet hooks and beads/baubles for decorative stitch markers-- and apart from craft-related objects, it's great for making so many other things, including jewelry, vessels/boxes, figures, dollhouse miniatures, and more.)
I used three colors of clay for my buttons-- translucent and a mixture of white pearl and ecru. Then I whipped up a simple cane with a translucent core wrapped in a sheet of "ecru pearl", which was in turn wrapped in another sheet of translucent. After reducing the cane (squishing and rolling it to make it thinner), I chopped it into a bunch of pieces (of relatively the same size), then stuck them together in two groups-- one per button. After flattening them out, I made the button holes and cured (baked) them. A little sanding and buffing on a piece of denim gave them a nice finish-- and they were ready for the pillow.
(I didn't get any really great close-up photos of the buttons, but I hope the basic idea comes across. I was happy with how they turned out. Kind of an organic-feeling result from an easy, fun clay session.)
- - - - - - -
With the pillow finished, I decided to bring a project out of hibernation.
This shawl went into snooze mode back in 2012. It's high time the thing was finished!
Pattern:
"Isis", designed by Anastasia Roberts
(Unfortunately, the Ravelry page says it's "temporarily unavailable"... Actually, it looks like all of her patterns are unavailable at the moment-- with most saying "no longer available", which sounds forbiddingly final. There's a note somewhere about reworking/improving some patterns, but based on comments on "Isis", that note may have been up for a while. No telling when or if these patterns will ever be put back up on Ravelry-- or elsewhere...)
Yarn:
I'm using "reclaimed" yarn from a thrift store sweater. It's a linen/cotton blend with a rustic feel-- which is why I'm calling this my "Rustic Shawl". Very creative, right? ;o)
I'm adding a repeat (or is it multiple repeats? don't remember...) to increase the size of the shawl, because it was working out to be too small for my liking.
I am determined to finish the shawl, this time, so there should be photos up, sooner or later. :o)